Synology NAS: Set up your own Cloud and replace Google
Sigh, my last blog post is several months old. It’s time to continue with a technical article. In this post I will show you how I have created my own cloud environment and replaced some Google services, which I have used before on my smart phone and PC.
Motivation
Like many people out there, I am an owner of a smart phone. Everything has started years ago with my first device, an Apple iPhone 3G, with which I started to use some Google cloud services like Google Calendar, Google Drive, Google Tasks and Google Contacts.
All of these free services are clearly very useful, user-friendly and offer an easy integration into iOS and Android. But there is another side of the coin, which you may not ignore. As we know that companies like Google can gain access to various three-letter-agencies. Intended or unintended. Don’t get me wrong! This kind of behavior is not restricted to Google only. Others like Microsoft, Apple and Amazon they are able to do the same thing.
Another important topic is centrally backing up and accessing of documents, pictures and videos. In the past I saved these kind of files on a second partition, on memory sticks or on external hard disks, like many other people. I was so optimistic, that a geek would be careful enough to not harm such data. It does not matter how, but I nearly lost them. That was the point in time I decided to get my own Cloud.
What do I need for a private cloud?
Enterprise private clouds are managed internally or by third-party, and hosted either internally or externally with services like Amazon Virtual Private Cloud or VMware Private Cloud. For one thing, it is an overkill for private users and for another thing your data would be still somewhere else.
I decided to host my own Cloud, which is completely under my control. For this purpose a NAS device is perfect. Friends of mine were using Synology NAS devices for years with good experiences. That’s why I have chosen this brand.
| Hardware | Software |
| Synology DiskStation DS213J | DS cloud |
| DS cloud (PC) | |
| WD Red interne NAS-Festplatte 1TB 2x | DAVdroid |
| OpenVPN Client | |
| OpenVPN Client (PC) | |
| Thunderbird (PC) + Lightning |
|
| Tasks |
How do I access my cloud?
I have decided to hide the installed services on my NAS, except the VPN service, which must be accessible from public. That means that all other services are only available after connecting to the virtual private network. From the security point of view, this is ideal, because more public services would mean a higher security risk.
Set up OpenVPN service on NAS
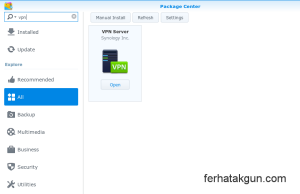
First of all, I assume that you have done the required basic configuration of your NAS on your own. Since VPN is not part of the default installation, we need to install it by using Package Center.
- Install VPN package
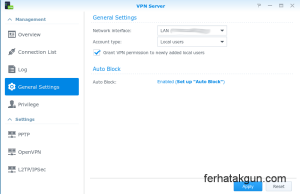
- General settings
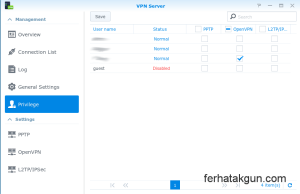
- Set user privilege
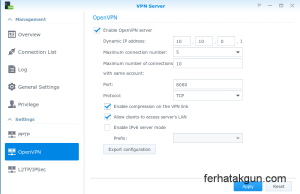
- Adjust OpenVPN settings
- Port settings via UPnP
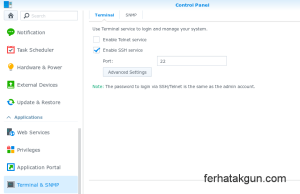
- Enable SSH
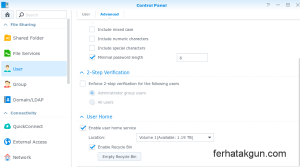
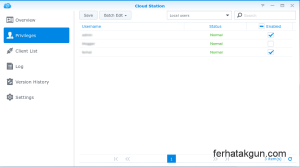
You have to set privileges for each user to be able to use VPN. This would be much easier if there would be a per-group-setting, which I really miss here. In this example I have used the protocol TCP and the port number 8080, which must be forwarded by your router. As long as you don’t have reasonable requirements, you should use the default configuration, which is UDP and 1194. You can use the Synology router configuration tool to set your port via UPnP or do it manually by using the config manager of your router.
In some cases, name resolution does not work. To fix this, we need to add one line into the server config file of OpenVPN. To do this, you need to enable SSH on your NAS device. After enabling, use an appropriate SSH client to access your NAS device.
ssh root@IP-OF-YOUR-NAS Diskstation> cd /usr/syno/etc/packages/VPNCenter/openvpn/ Diskstation> vi openvpn.conf |
Insert this line into your config file and relaunch the service. It will push the IP of your DNS server to your vpn clients.
push "dhcp-option DNS IP-Of-Your-Default-Gateway" |
Configure your OpenVPN client
Before doing so, we need to get the configuration for the client. Go back to OpenVPN settings and click on Export configuration. Your browser will download a ZIP package, which will contain a CRT and a OVPN file. The first one is used by the client to identify the server. If you haven’t created server certificates, do it before continuing. The second file is the client configuration file, which we need to modify.
remote YOUR_SERVER_IP 8080 |
Replace YOUR_SERVER_IP with your external IP. If you don’t get a static IP from your ISP, it is recommended to place here a DNS name. You can obtain one, using free services like DynDNS or MyFRITZ.
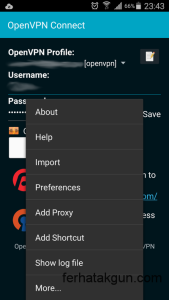
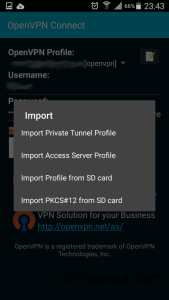
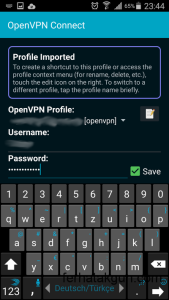
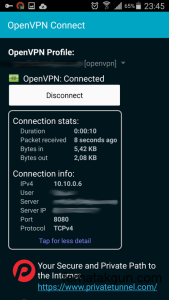
Copy both files into your smart phone and start your OpenVPN client. Import OpenVPN profile. Right after that, you can enter your credentials and connect to your server. The configuration for iOS, Windows and Linux are very similar.
- Open menu
- Import profile
- Enter credentials
- Connected
How do I replace Google Drive…
Synology provides a service called Cloud Station to synchronize data between your clients (Smartphone, PC, Notebook, Tablet etc.) and your NAS. After installing that package, start it from DSM main menu. The configuration is really straightforward. See my screenshots below. Don’t enable SSL, if you want to access the service via VPN.
- Enable Home Service
- Set user privileges
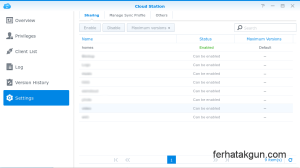
- Enable share
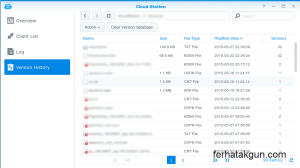
- Version History
After syncing some files you will see that Cloud Station stores the changes of your synced files. The default number of stored versions is 32, which you can change if necessary.
…on my Desktop?
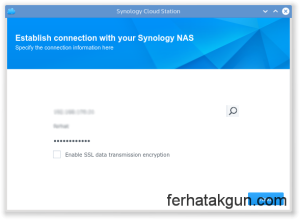
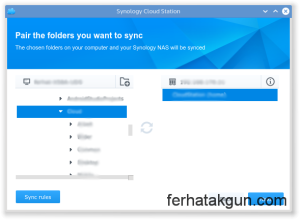
If your desktop client is not part of the same network, install and run OpenVPN client before proceeding. After installing the desktop client, you have to connect to your NAS by entering the (local) IP or hostname of your NAS. Use a username with Cloud Station privileges.
- Start Cloud Station
- Connect to NAS
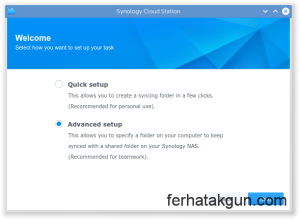
- Advanced setup
- Choose local and remote folder
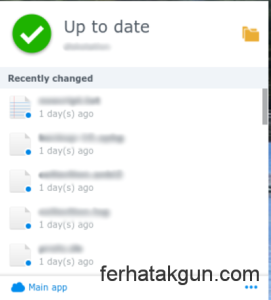
- Last changed files
After putting some files into your local Cloud Station folder, you will see that the files will be synced immediately to all your devices.
…on my smart phone?
Syncing between desktop clients and NAS is fine but, what if we need to put or get data, while heading to somewhere? We need Cloud Station on our smart phone!
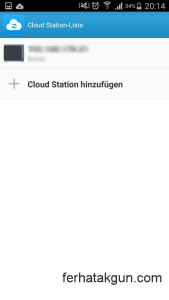
- Connect to NAS
- Choose NAS
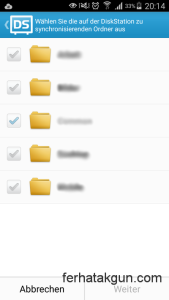
- Select remote folder
- Select local folder
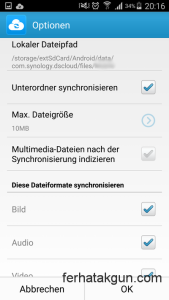
- Sync settings
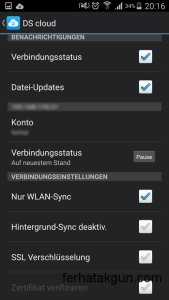
- App settings
Connect to your home network with OpenVPN and do configuration as shown above. Important: Depending on what you sync, the process can increase your mobile traffic! In my case I have turned on the option to sync only if WiFi is available. In urgent cases I can turn it off to sync via mobile access.
How do I replace Google Calendar, Contacts and Tasks…
If you have used Google Calendar or Google Contacts before, you are probably familiar with the web interface and the management of particular contents. A similar interface is provided by my first alternative named ownCloud. OwnCloud provides out of the box an interface for managing files. It looks a bit like the user interface of Dropbox. With adding some other free extensions, the so-called Apps, ownCloud can offer much more than the base functionality.
Two of these extensions named Contacts and Calendar were the reason, why I tried it on my NAS device. I regret to say that, but I have recognized that running ownCloud on my NAS is a bit slow and annoying while browsing and editing around 500 contacts. I am pretty sure that it will run better on a machine with much more power. Just try ownCloud on your own.
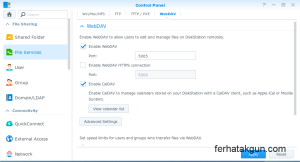
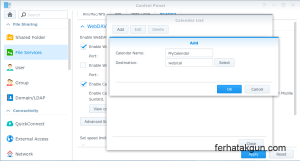
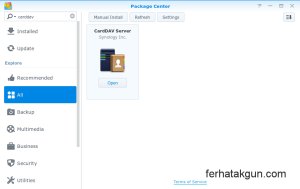
So what did I do instead? I used the built-in CalDAV (Calendar) and the CardDAV (Contacts) services of DSM. These services do not provide a nice looking web interface, but you will see that it’s actually not necessary.
- Enable WebDAV and CalDAV
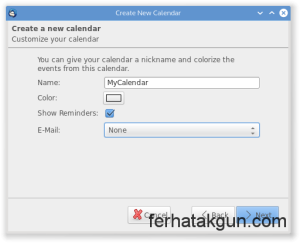
- Create calendar
- Install CardDAV
- Change CardDAV port if necessary
…on my Desktop?
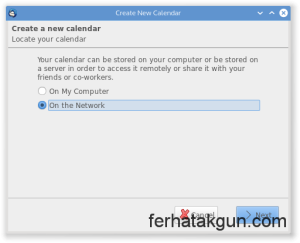
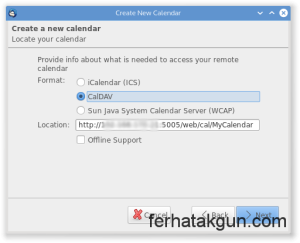
I would recommend Mozilla Thunderbird. It’s available for Linux, Windows and Mac OS. I am using this client just for accessing my calendar and my tasks. After installing Thunderbird and the addon Lightning access your calendar.
- Calendar is on the network
- CalDAV location on network
- Name of calendar
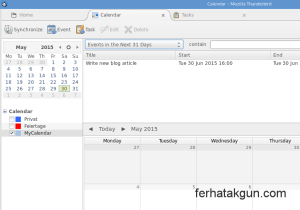
- New event in Thunderbird
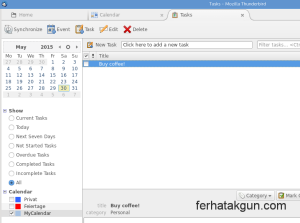
- New Task in Thunderbird
For testing purposes I have created one new event in MyCalendar and one new task. These two items were synced immediately to my NAS device.
…on my smart phone?
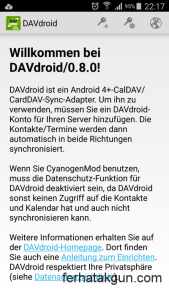
Well, sadly Android can neither handle CalDAV nor CardDAV out of the box. We need an app called DAVdroid. Before installing DAVdroid it’s very important that you install the app Tasks first. I referenced both apps in the table above. Follow my screenshots below to set up your smart phone.
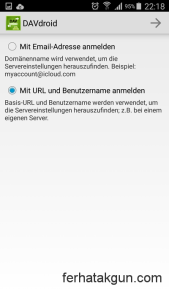
- Start DAVdroid
- Choose URL and credentials mode
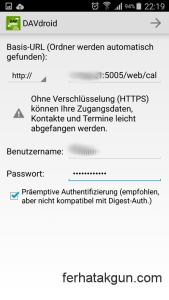
- URL and credentials for CalDAV
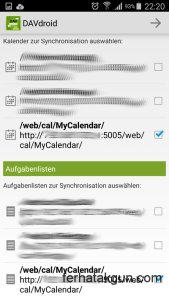
- Found Calendar and Task list
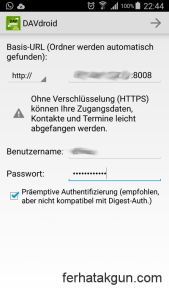
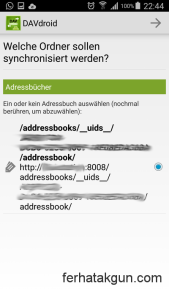
- URL and credentials for CardDAV
- Found address book
- Accessing Task list via Tasks
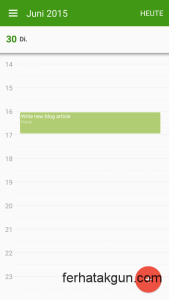
- Accessing calendar









Hello!
Clear and very useful. Thank you!
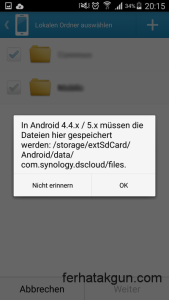
Hi, did you find a way to configure DS cloud to sync a folder on your SD card. I have a HTC One M8 running android 6 and I cannot get it to select any existing folders on my SD card
Hi Antony, have you tried to access the path /storage/extSdCard/? Here you will find the content of your SD card. Please check this. In my case it worked very well.
Hi Ferhat, very detailed explanations! thanks.
One question though: How to link your email address with your caldav calendar on an Iphone?
Cheers
Francois
Hi François, thank you! I don’t have an iPhone but maybe I can help you anyway.
What do you want to do exactly with the email link?
Thanks, Ferhat
Hi Fehrat, when I receive an invitation on my email, if I accept it, I want the invitation to be in my caldav calendar.
Similarly, when I create a meeting in my calendar I would like to be able to add invitees.
Thanks for your help,
Francois
Hi François, I am not sure how an iPhone handles this but every invitation should contain an attached ICS file. What happens when you open that file? If this file is not handled by the iPhone calendar app, you will probably need an additional app. In case of Android it’s like this.
Thanks, Ferhat
Hi Ferhat, yes it does content an ics file when I receive an invitation. The challenge starts when I want to create an invitation and invite people… As the calendar isn’t linked with an email account, I can’t do it.
Cheers
Francois
Hi François, I got it now but I didn’t use this feature before. A quick test showed me that the invitation could not be received. I have to check that later and will update the article in case I find a way to handle this.
Thanks,
Ferhat
Thanks Ferhat!
Cheers
Francois
You are welcome!
Thanks,
Ferhat
Hi,
BTW I fogot to congratulate Ferhat for this very nice article.
I have some pieces already installed on my DS1515+ and will soon add more from this excellent article ?
Michel.
Humm.. looks like my first post did not go through.
It was related to François‘ issue that Ferhat was to look into.
Ferhat, any news related to the calendar and invites ?
Thanks,
Michel.
Hi Michel, thanks for your comments. Actually I didn’t do any further investigation on this. If you guys have any updates please share, so I can update the article.
Any ideas on how to set up with Thunderbird so that calendar edit from TBird will go to Synology. None of my edits work. Even reopening them in Tbird before syncing shows they have reverted to original